December 2020
Bottom Skins

This month has been even crazier than last month but my goodness so much
progress!
Doing more work on the Gonk was a complete accident this month. I only intended to do something small and I ended up doing a lot!
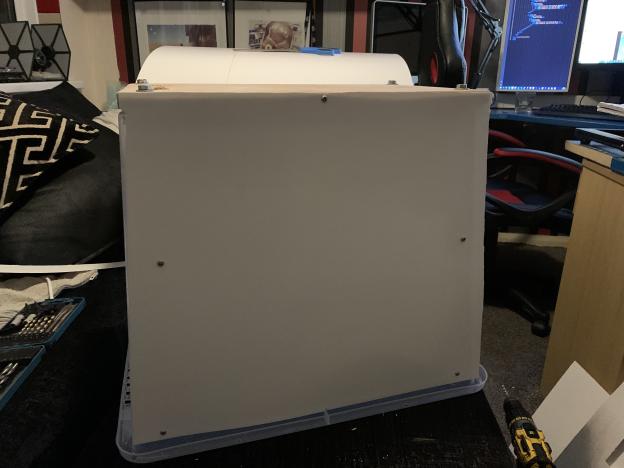
Firstly, we have a skinned bottom! Until I order some more nuts, bolts and washers I haven't fixed it in completely. Once that is complete I can fully fix the skins to the box. Once that is done I can work on the polystyrene ribbing on the inside for slightly more structual strength.
Once that is completed I will do a few more tests to make sure if the Gonk is nudged or it moves at all, the paint and filler will not crack.
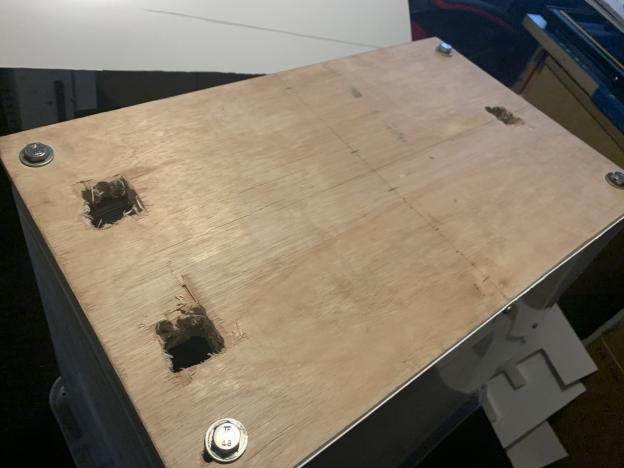
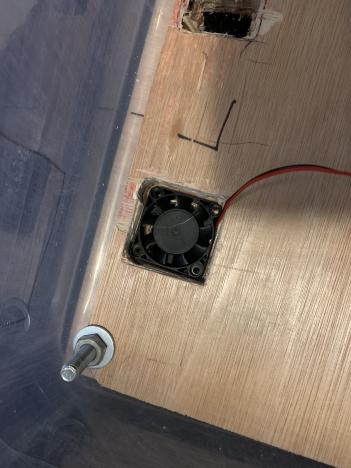 I have cut some squares in the bottom of my droid. These are for three
small fans. With my Gonk Droid being a fully functional one, I am aware
that inside of my droid will probably get rather warm. To compensate for that
will install three 400mm squared CPU fans at the bottom of the droid which
will pull in cool air from the floor and distribute it inside the droid.
I have cut some squares in the bottom of my droid. These are for three
small fans. With my Gonk Droid being a fully functional one, I am aware
that inside of my droid will probably get rather warm. To compensate for that
will install three 400mm squared CPU fans at the bottom of the droid which
will pull in cool air from the floor and distribute it inside the droid.
At the top rear of the droid I plan to have a large extractor fan. This will be rather industrial in it's style and it's job would be to push out the warm air that has risen. I do want that large extractor fan to be isolatable just encase it is not needed. Since I am unsure what fan I would get I am unsure what power requirements it will have and whether it would be a large drain.
In order to really test my electronics skills I could put a temperature sensor inside of the droid, find an ambiant temperature and program the fan to turn on if the temperature gets too hot inside. The main function is to regulate the temperate internally to make sure that the components and wiring doesn't get too hot.

 The center ribbon as I call it is important because it hides the join between the two tubs.
To join my tubs, I drilled holes and poked some nuts and bolts between
and then screwed them down. This worked out very well and the idea was to
have the central ribbon, which I am using two strips of styrene for, to
hide this join. The central ribbon will be connected to the top tub ideally
using pop rivets however I fear that using those will be too aggressive for
the tubs so for now I am using standard wood screws to hold it in place.
The center ribbon as I call it is important because it hides the join between the two tubs.
To join my tubs, I drilled holes and poked some nuts and bolts between
and then screwed them down. This worked out very well and the idea was to
have the central ribbon, which I am using two strips of styrene for, to
hide this join. The central ribbon will be connected to the top tub ideally
using pop rivets however I fear that using those will be too aggressive for
the tubs so for now I am using standard wood screws to hold it in place.
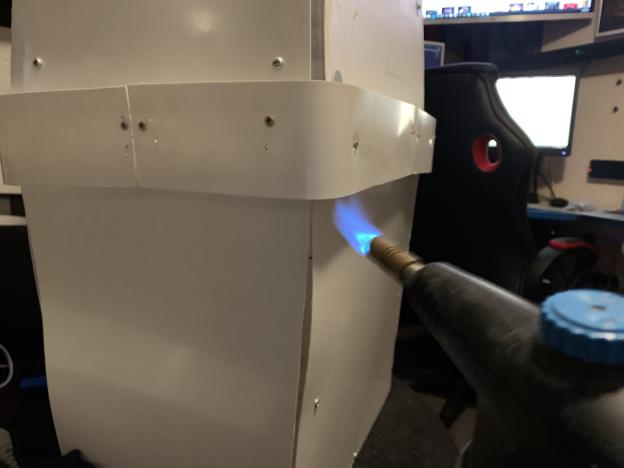
I used a clamp to hold the ribbon in place whilst I lined it up and screwed it in and I will probably revisit this again since I am not 100% happy with the position of it. I found using a blow torch really helped to shape the styren around the corner of the tubs. You can use a heat gun if that is what you have but I had the blow torch to hand for another project, also it was very fun to use a blow torch. Just remember to evenly spread the heat and do not get too close!

 This is possibly my most favourite part of my progress. I spent quite a bit
of time trying to make this work and so far it has worked perfectly. When I
was skinning my droid, I made sure to skin it all. Once I was ready, I cut
out a hatch in the styrene and I put it to one side, this would be the hatch
when I was done.
This is possibly my most favourite part of my progress. I spent quite a bit
of time trying to make this work and so far it has worked perfectly. When I
was skinning my droid, I made sure to skin it all. Once I was ready, I cut
out a hatch in the styrene and I put it to one side, this would be the hatch
when I was done.
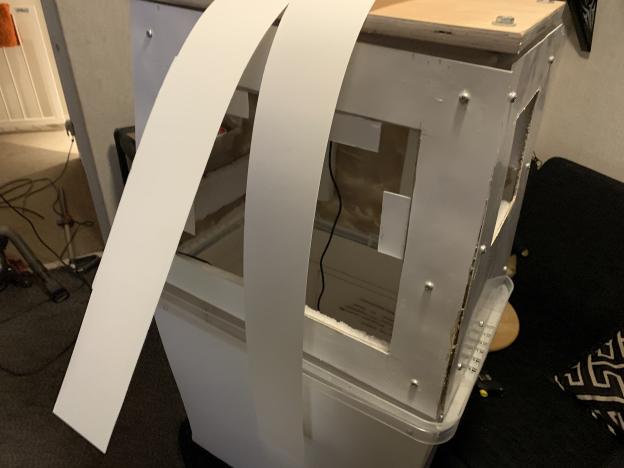
I also had to cut a hatch in the tub itself, this was more of a challenge. In hindsight, I should have cut a smaller hatch in the tub that way when the styrene hatch door sits on top of it, it rests on the inner tub, similar to R2's panels. That thought didn't come to me until after I cut the hatch.
What I was able to do was to glue some strips of styrene side by side to the actual tub, creating a platform of sorts. When I was buying horse shoe magnets for R2, I ordered the wrong size and I ended up having very small Rare Earth Magnets. I measured 5mm Diameter magnets, very small they easily fit on the tip of your finger.
I was quite impressed with my technique of sticking the magnets in the right place. One magnet went on the inside of the styrene platform, as far inside the droid and the other went on the other side of the styrene. The styrene platform I glue ended up sandwhiched by the magnets. I did that on every strip. Positioning the magnets was simple enough, I just put them in the center and then placed over the styrene hatch to make sure they all were in the right place.
I used super glue around the magnets on the inside, gave them a good coat since I know the magnets were rather strong and I didn't want them to be ripped off. Once they were completely dry, I went to work on the outside. Pulling the magnets off as a test to make sure everything worked, I placed the magnets back on the styrene platforms to ensure their position was still correct. I put one of two drops of CA Super Glue on the outside magnets (the magnet that attach to the styrene hatch). I was thinking of doing them all at once but I thought that I would struggle to secure them all and some wouldn't stick. I did one magnet at a time, dropping a few droids onto the back of the magnet and then pressing the hatch onto it to stick.
In theory, the hatch is always in place when you are glueing the magnets to the hatch. So far, it works perfectly!
Doing more work on the Gonk was a complete accident this month. I only intended to do something small and I ended up doing a lot!
Firstly, we have a skinned bottom! Until I order some more nuts, bolts and washers I haven't fixed it in completely. Once that is complete I can fully fix the skins to the box. Once that is done I can work on the polystyrene ribbing on the inside for slightly more structual strength.
Once that is completed I will do a few more tests to make sure if the Gonk is nudged or it moves at all, the paint and filler will not crack.
Base Fans
I have cut some squares in the bottom of my droid. These are for three
small fans. With my Gonk Droid being a fully functional one, I am aware
that inside of my droid will probably get rather warm. To compensate for that
will install three 400mm squared CPU fans at the bottom of the droid which
will pull in cool air from the floor and distribute it inside the droid.
At the top rear of the droid I plan to have a large extractor fan. This will be rather industrial in it's style and it's job would be to push out the warm air that has risen. I do want that large extractor fan to be isolatable just encase it is not needed. Since I am unsure what fan I would get I am unsure what power requirements it will have and whether it would be a large drain.
In order to really test my electronics skills I could put a temperature sensor inside of the droid, find an ambiant temperature and program the fan to turn on if the temperature gets too hot inside. The main function is to regulate the temperate internally to make sure that the components and wiring doesn't get too hot.
Center Ribbon
The center ribbon as I call it is important because it hides the join between the two tubs.
To join my tubs, I drilled holes and poked some nuts and bolts between
and then screwed them down. This worked out very well and the idea was to
have the central ribbon, which I am using two strips of styrene for, to
hide this join. The central ribbon will be connected to the top tub ideally
using pop rivets however I fear that using those will be too aggressive for
the tubs so for now I am using standard wood screws to hold it in place.
I used a clamp to hold the ribbon in place whilst I lined it up and screwed it in and I will probably revisit this again since I am not 100% happy with the position of it. I found using a blow torch really helped to shape the styren around the corner of the tubs. You can use a heat gun if that is what you have but I had the blow torch to hand for another project, also it was very fun to use a blow torch. Just remember to evenly spread the heat and do not get too close!
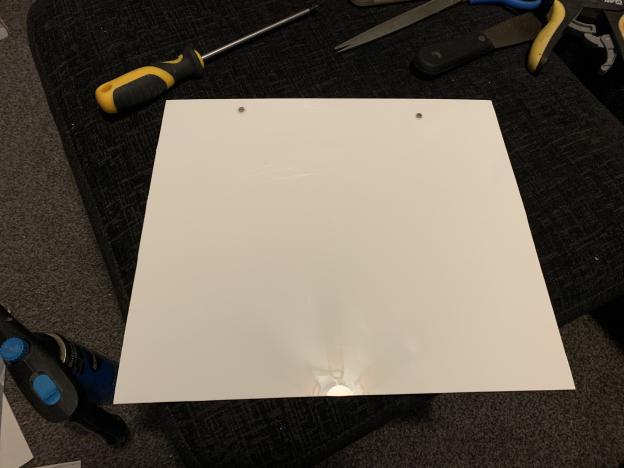
Magnetic Hatch
This is possibly my most favourite part of my progress. I spent quite a bit
of time trying to make this work and so far it has worked perfectly. When I
was skinning my droid, I made sure to skin it all. Once I was ready, I cut
out a hatch in the styrene and I put it to one side, this would be the hatch
when I was done.
I also had to cut a hatch in the tub itself, this was more of a challenge. In hindsight, I should have cut a smaller hatch in the tub that way when the styrene hatch door sits on top of it, it rests on the inner tub, similar to R2's panels. That thought didn't come to me until after I cut the hatch.
What I was able to do was to glue some strips of styrene side by side to the actual tub, creating a platform of sorts. When I was buying horse shoe magnets for R2, I ordered the wrong size and I ended up having very small Rare Earth Magnets. I measured 5mm Diameter magnets, very small they easily fit on the tip of your finger.
I was quite impressed with my technique of sticking the magnets in the right place. One magnet went on the inside of the styrene platform, as far inside the droid and the other went on the other side of the styrene. The styrene platform I glue ended up sandwhiched by the magnets. I did that on every strip. Positioning the magnets was simple enough, I just put them in the center and then placed over the styrene hatch to make sure they all were in the right place.
I used super glue around the magnets on the inside, gave them a good coat since I know the magnets were rather strong and I didn't want them to be ripped off. Once they were completely dry, I went to work on the outside. Pulling the magnets off as a test to make sure everything worked, I placed the magnets back on the styrene platforms to ensure their position was still correct. I put one of two drops of CA Super Glue on the outside magnets (the magnet that attach to the styrene hatch). I was thinking of doing them all at once but I thought that I would struggle to secure them all and some wouldn't stick. I did one magnet at a time, dropping a few droids onto the back of the magnet and then pressing the hatch onto it to stick.
In theory, the hatch is always in place when you are glueing the magnets to the hatch. So far, it works perfectly!